Unityで3Dゲームを作成しよう!
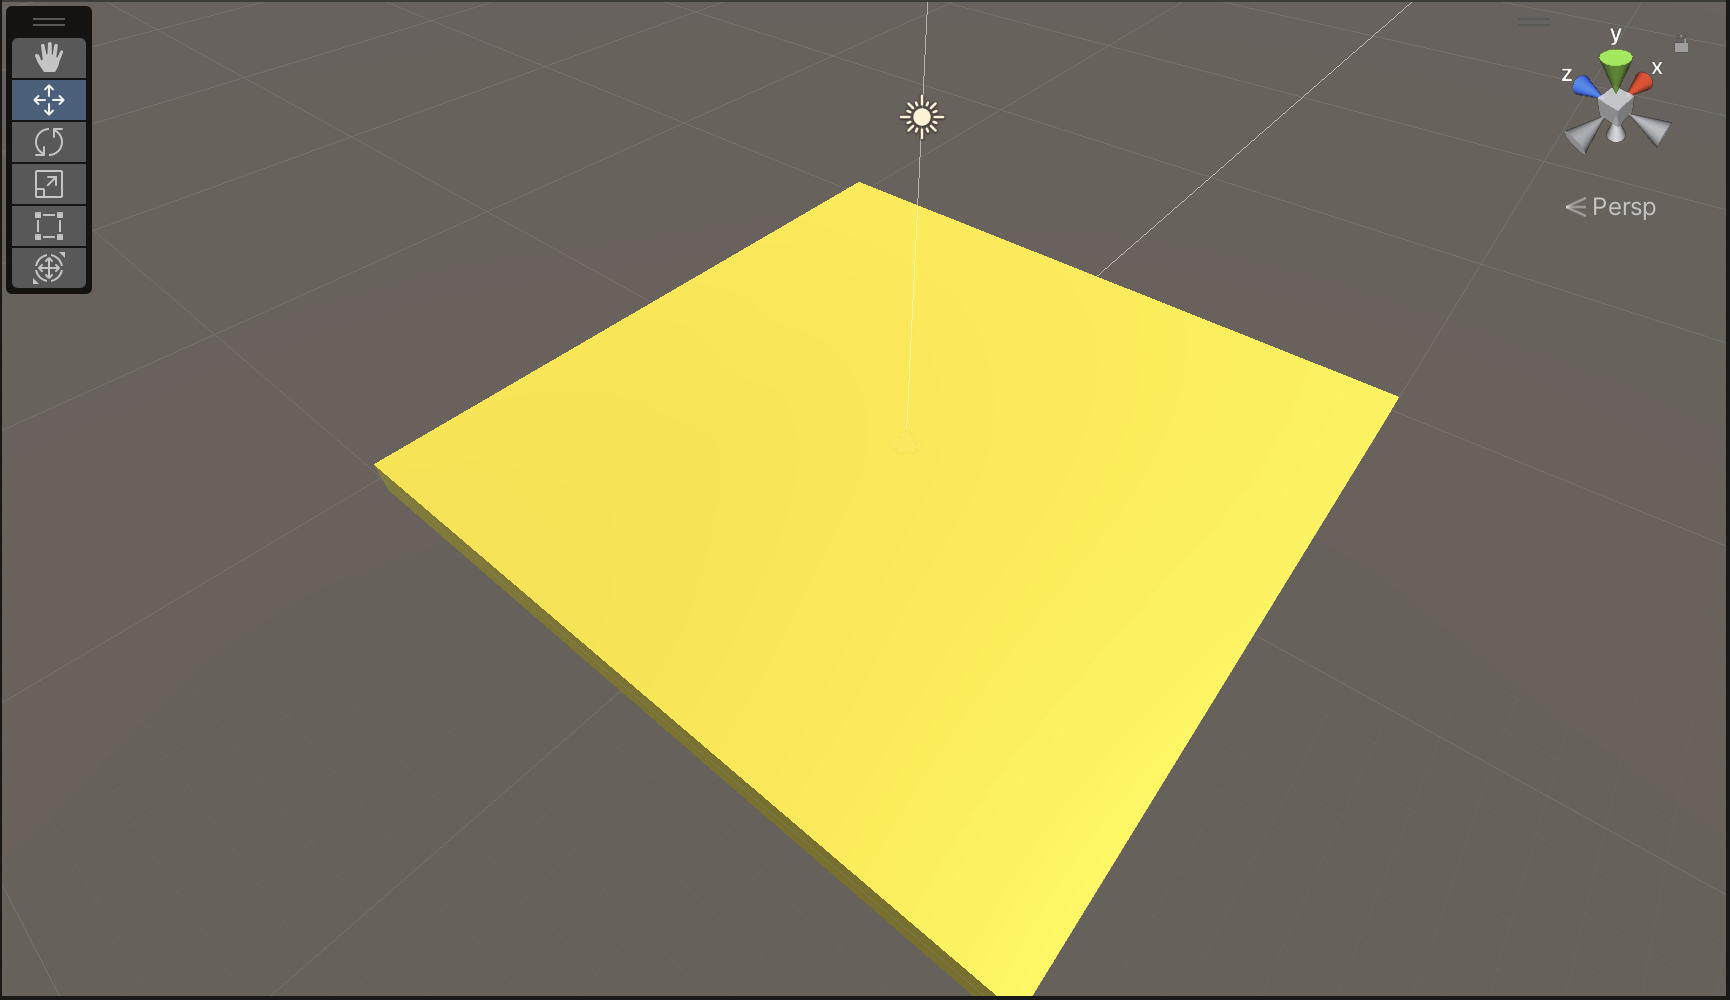
1.ステージを作成しよう!
まずはベースとなる「Cubeオブジェクト」を設置します。
2.ボールを十字キーで移動させる
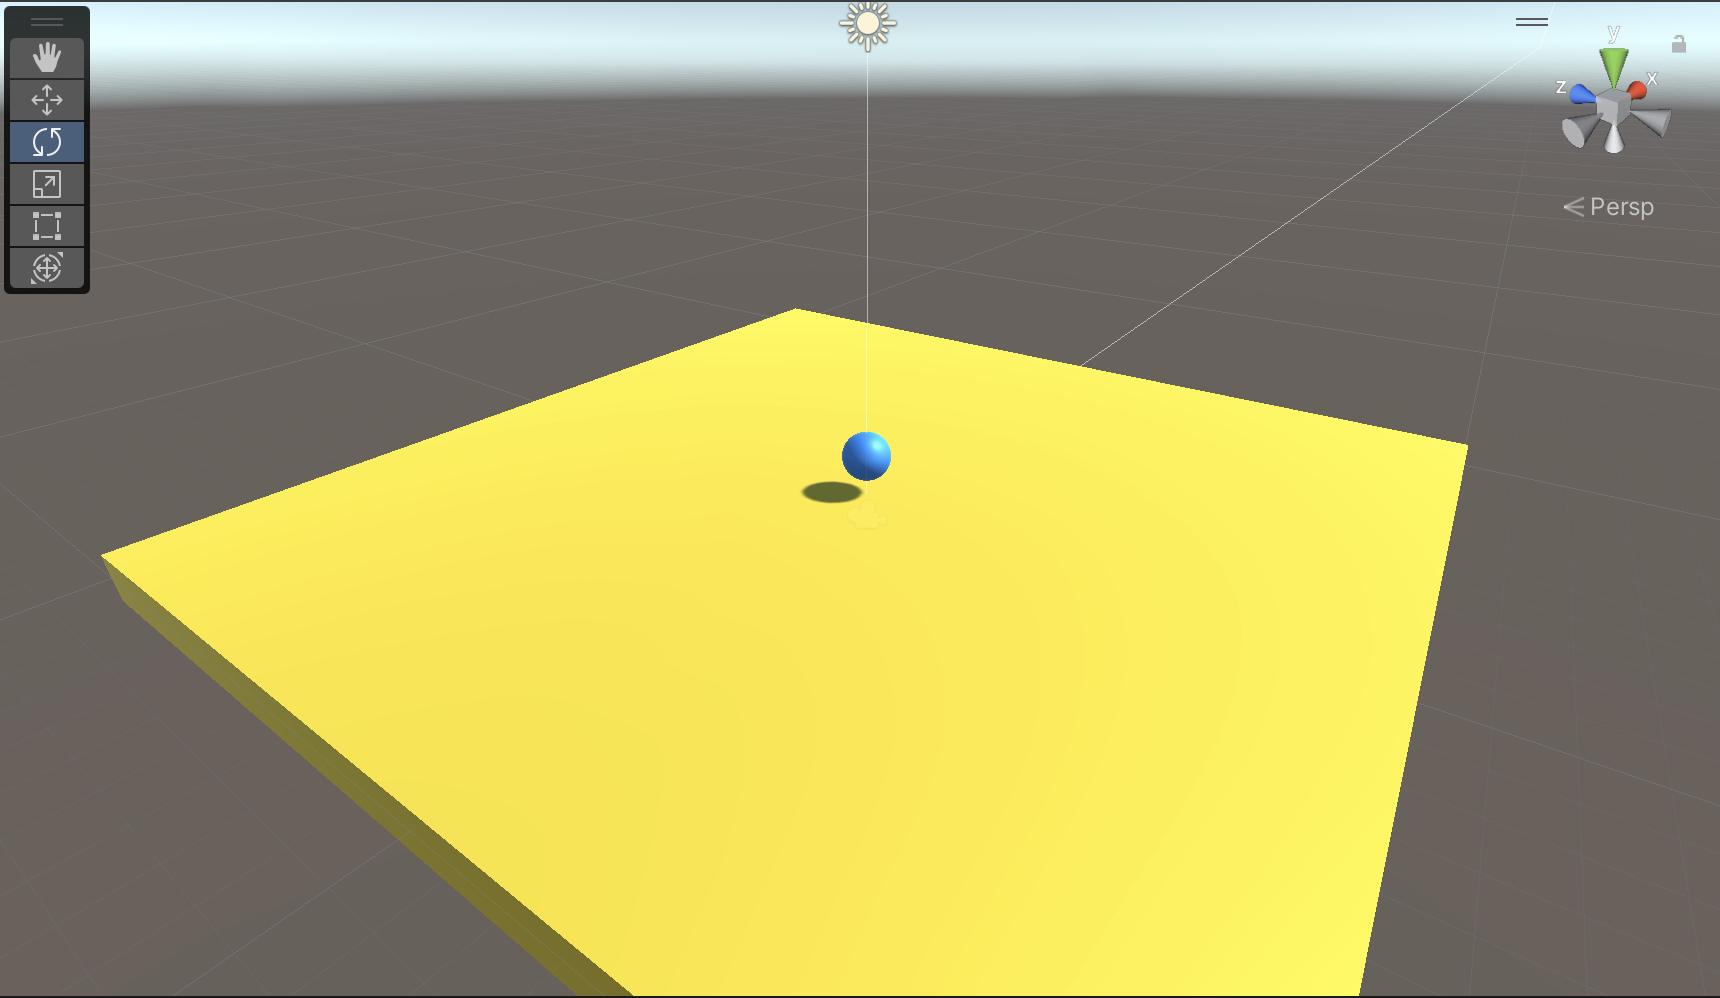
スクリプトの作成
using System.Collections;
using System.Collections.Generic;
using UnityEngine;

public class BallController : MonoBehaviour
{
    public float speed = 5.0f; // これは玉の速度です。Inspectorから変更することもできます。
    private Rigidbody rb;

    // Start is called before the first frame update
    void Start()
    {
        rb = GetComponent<Rigidbody>();
    }

    // FixedUpdate is called once per physics step
    void FixedUpdate()
    {
        float moveHorizontal = Input.GetAxis("Horizontal");
        float moveVertical = Input.GetAxis("Vertical");

        Vector3 movement = new Vector3(moveHorizontal, 0.0f, moveVertical);

        rb.AddForce(movement * speed);
    }
}
3.カメラがボールを追跡するようにする
スクリプトの作成
using System.Collections;
using System.Collections.Generic;
using UnityEngine;

public class FollowObject : MonoBehaviour
{
    public Transform target; // 追跡するオブジェクト
    public Vector3 offset; // オブジェクトとカメラの相対的なオフセット

    // LateUpdate is called once per frame, after all Update functions have been called
    void LateUpdate()
    {
        // ターゲットの位置とオフセットを考慮して、カメラの位置を更新
        transform.position = target.position + offset;
    }
}
4.浮遊して回転するアイテムを作成・設置する
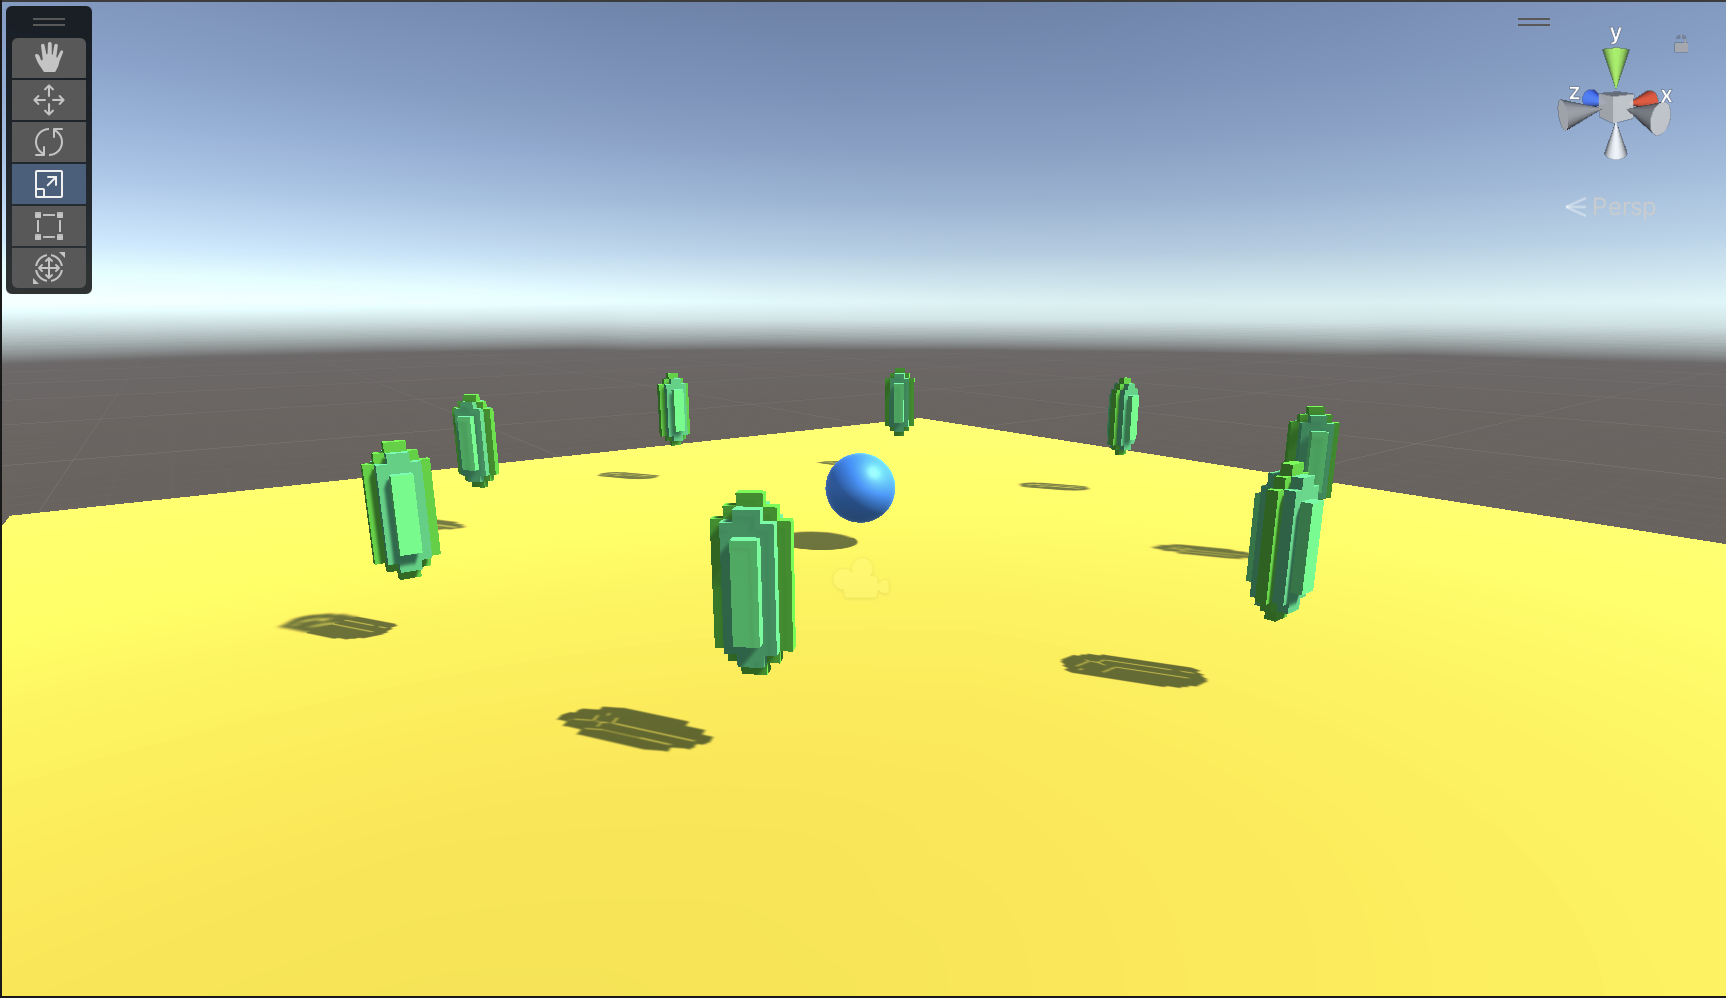
宝石アイテムのデータをダウンロード
※ボクセルで編集したい場合は↓のデータをダウンロード
浮遊・回転のプログラム
スクリプトの作成
using System.Collections;
using System.Collections.Generic;
using UnityEngine;

public class FloatingAndRotating : MonoBehaviour
{
    public float rotationSpeed = 30f;        // 回転速度(度/秒)
    public float floatingSpeed = 2f;       // 浮遊速度
    public float floatingAmplitude = 0.2f;   // 浮遊の振幅

    private Vector3 initialPosition;         // 初期位置
    private float floatingOffset;            // 浮遊のオフセット

    void Start()
    {
        // 初期位置を保存
        initialPosition = transform.position;
        // ランダムなオフセットで開始することで、複数のオブジェクトが同期しないようにする
        floatingOffset = Random.Range(0, 2 * Mathf.PI);
    }

    void Update()
    {
        // 回転
        transform.Rotate(Vector3.up, rotationSpeed * Time.deltaTime);

        // 浮遊
        float newYPosition = initialPosition.y + Mathf.Sin(Time.time * floatingSpeed + floatingOffset) * floatingAmplitude;
        transform.position = new Vector3(initialPosition.x, newYPosition, initialPosition.z);
    }
}-
ゲームオブジェクトを選択します
: あなたが
isTriggerの設定を変更したいゲームオブジェクトをヒエラルキーウィンドウから選択します。 - インスペクタウィンドウから Colliderコンポーネントを探します。 ゲームオブジェクトに追加されているColliderコンポーネント(例: Box Collider, Sphere Colliderなど)を探します。
-
Colliderコンポーネントの中に
isTriggerというオプションがあります。そのチェックボックスにチェックを入れることで、このColliderは物理的な衝突を行わず、トリガーイベントのみを検知するようになります。
5.アイテムとの当たり判定と得点をプログラムする
スクリプトの作成
CollectibleController.cs
using System.Collections;
using System.Collections.Generic;
using UnityEngine;

public class CollectibleController : MonoBehaviour
{
    public int score = 0;

    void OnTriggerEnter(Collider other)
    {
        if (other.gameObject.CompareTag("items"))
        {
            other.gameObject.SetActive(false);
            score = score + 1;
            Debug.Log("Score: " + score);
        }

    }
}
このスクリプト
CollectibleController
は、プレイヤーが特定のアイテム(タグが"items"とされたもの)に接触したときにアイテムを非表示にし、スコアを加算するためのものです。以下に、このスクリプトをプレイヤーにアタッチし、itemsのオブジェクトが動作するようにする手順を説明します。
-
スクリプトをプレイヤーにアタッチする
まず、Unityのエディタでプレイヤーのオブジェクトを選択します。Hierarchyウィンドウでプレイヤーのオブジェクト(例えば、"Player")をクリックすることで選択できます。
プレイヤーが選択されたら、Inspectorウィンドウで"Add Component"ボタンをクリックします。表示されたテキストボックスに"CollectibleController"と入力し、"CollectibleController"スクリプトを選択してクリックします。これによりスクリプトがプレイヤーオブジェクトにアタッチされます。
-
アイテムオブジェクトを設定する
次に、プレイヤーが拾うことができるアイテムオブジェクトを設定します。これは例えば、コインや宝石など、プレイヤーが集めるべきものです。
まず、Hierarchyウィンドウでアイテムオブジェクトを選択します。次にInspectorウィンドウで"Tag"のドロップダウンメニューをクリックし、新しいタグを作成します。"Add Tag..."をクリックし、出てくる新しいウィンドウで"+"ボタンを押して新しいタグを作ります。新しいタグの名前を"items"とし、"Save"ボタンを押します。
新しいタグを作成したら、再度アイテムオブジェクトをInspectorウィンドウで選び、"Tag"のドロップダウンメニューから"items"を選択します。これで、アイテムがプレイヤーによって拾うことができるようになりました。
これらの設定により、プレイヤーが"items"タグのついたアイテムに接触すると、アイテムは非表示になり、プレイヤーのスコアが1増えます。スコアの現在値はUnityのConsoleウィンドウに表示されます。
6.ポイントを画面に表示できるようにする
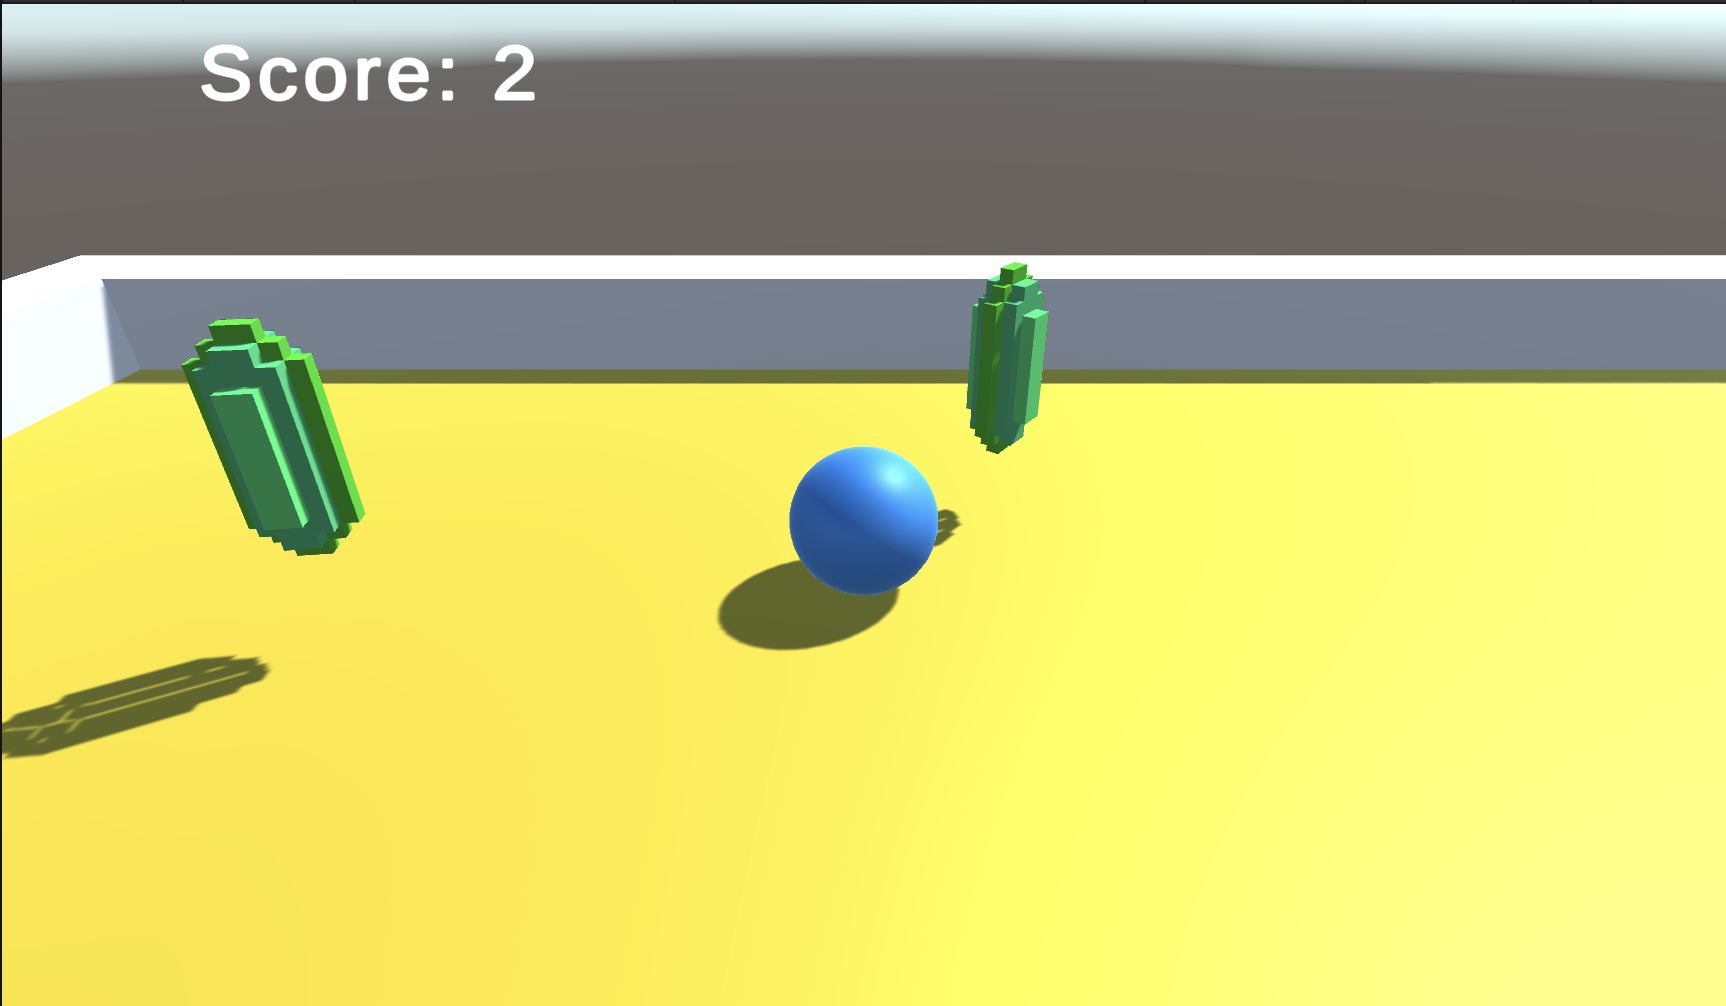
Unityでは、スコアなどの情報を表示するためにUI(User Interface)システムを利用します。スコアを表示するためのUIテキストオブジェクトを作成し、スクリプトからそのテキストを更新することでスコアを表示できます。
まず、スコアを表示するUIを作成する手順です:
- Unityのエディタ上で"GameObject"メニューを開き、"UI" -> "Text - TextMeshPro"を選択します(TextMeshProはUnityの高品質なテキスト表示機能です。使う前にパッケージをインストールする必要があるかもしれません)。
- Hierarchyウィンドウで新しく作成された"Text - TextMeshPro"オブジェクトを選択し、Inspectorウィンドウで表示内容やフォント、色などを設定します。
- この"Text - TextMeshPro"オブジェクトにわかりやすい名前(例えば"ScoreText")をつけます。
次に、スクリプトからUIテキストを更新する方法を説明します。以下のように
CollectibleController
スクリプトを更新します:
スクリプトの作成
using System.Collections;
using System.Collections.Generic;
using UnityEngine;
using TMPro;  // TextMeshProを使うための命名空間

public class CollectibleController : MonoBehaviour
{
    public int score = 0;
    public TMP_Text scoreText;  // スコアを表示するTextMeshProオブジェクトへの参照

    void Start()
    {
        UpdateScoreText();
    }

    void OnTriggerEnter(Collider other)
    {
        if (other.gameObject.CompareTag("items"))
        {
            other.gameObject.SetActive(false);
            score = score + 1;
            UpdateScoreText();
        }
    }

    void UpdateScoreText()
    {
        scoreText.text = "Score: " + score;
    }
}
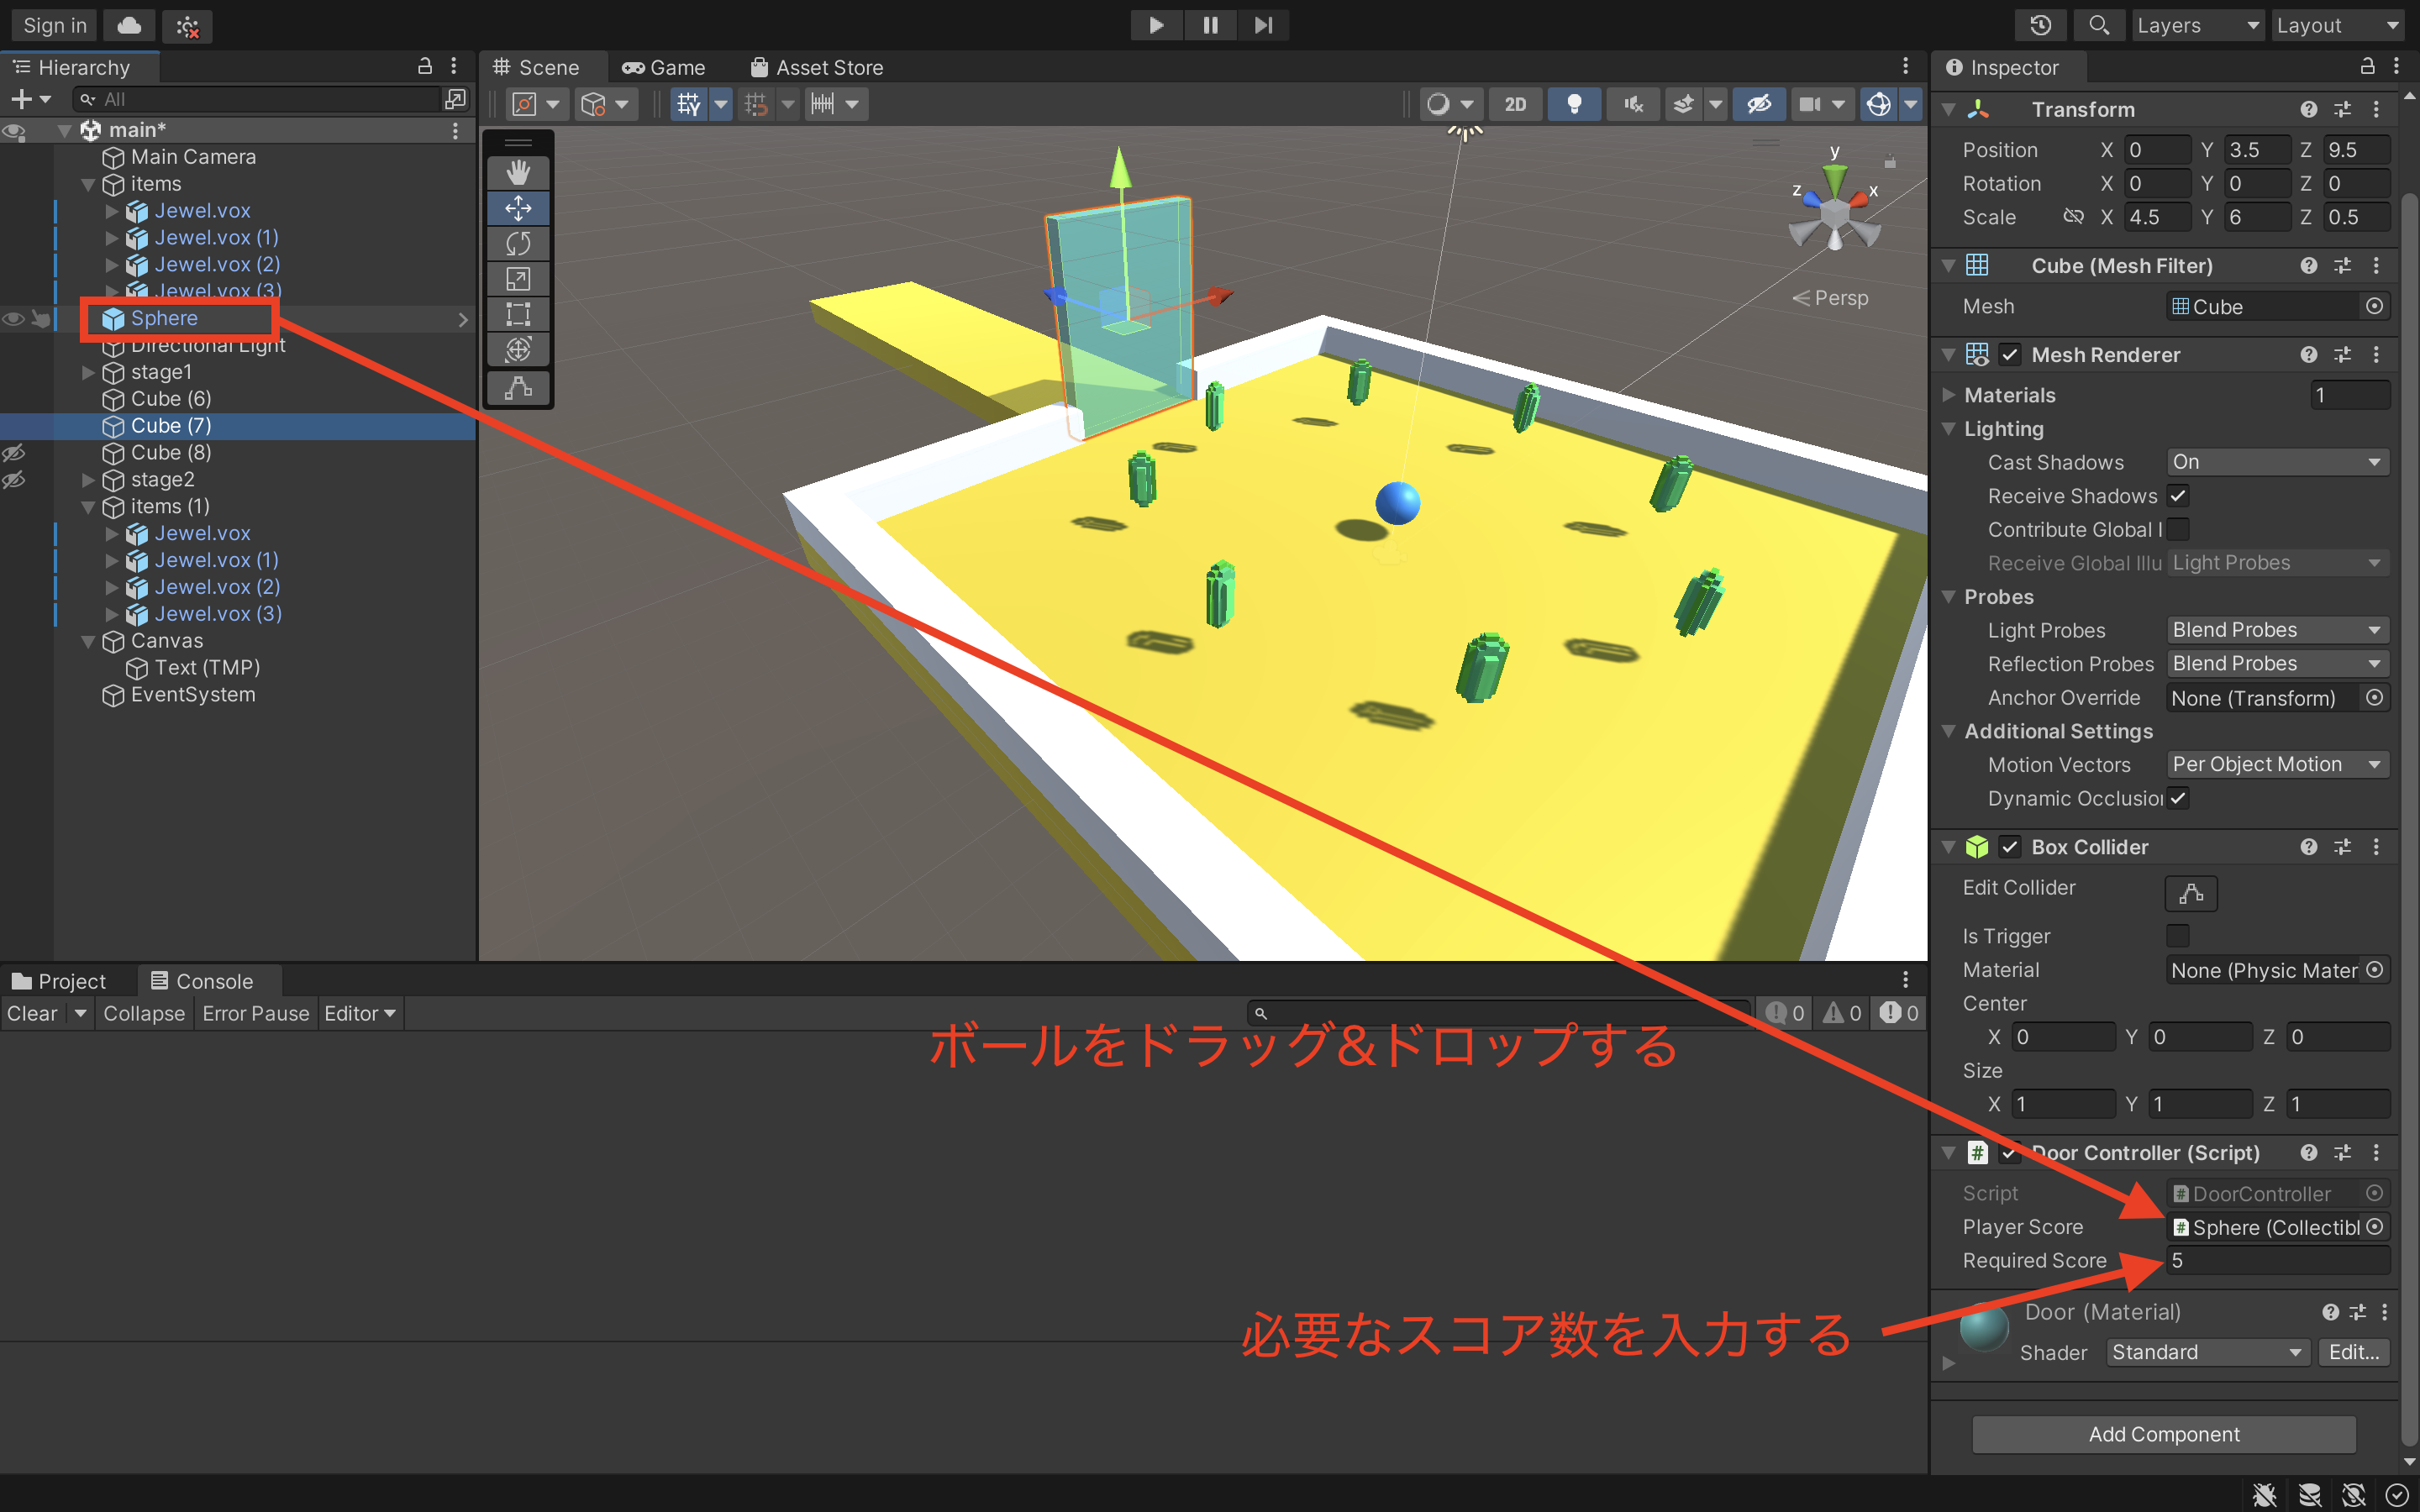
最後に、Unityのエディタでプレイヤーオブジェクトを選択し、Inspectorウィンドウの
CollectibleController
コンポーネントで
Score Text
フィールドに先ほど作成した"ScoreText"オブジェクトをドラッグ&ドロップします。
以上で、プレイヤーがアイテムを拾うたびにスコアがUIに表示されるようになります。
7.アイテムを全て集めると消えるドアの作成
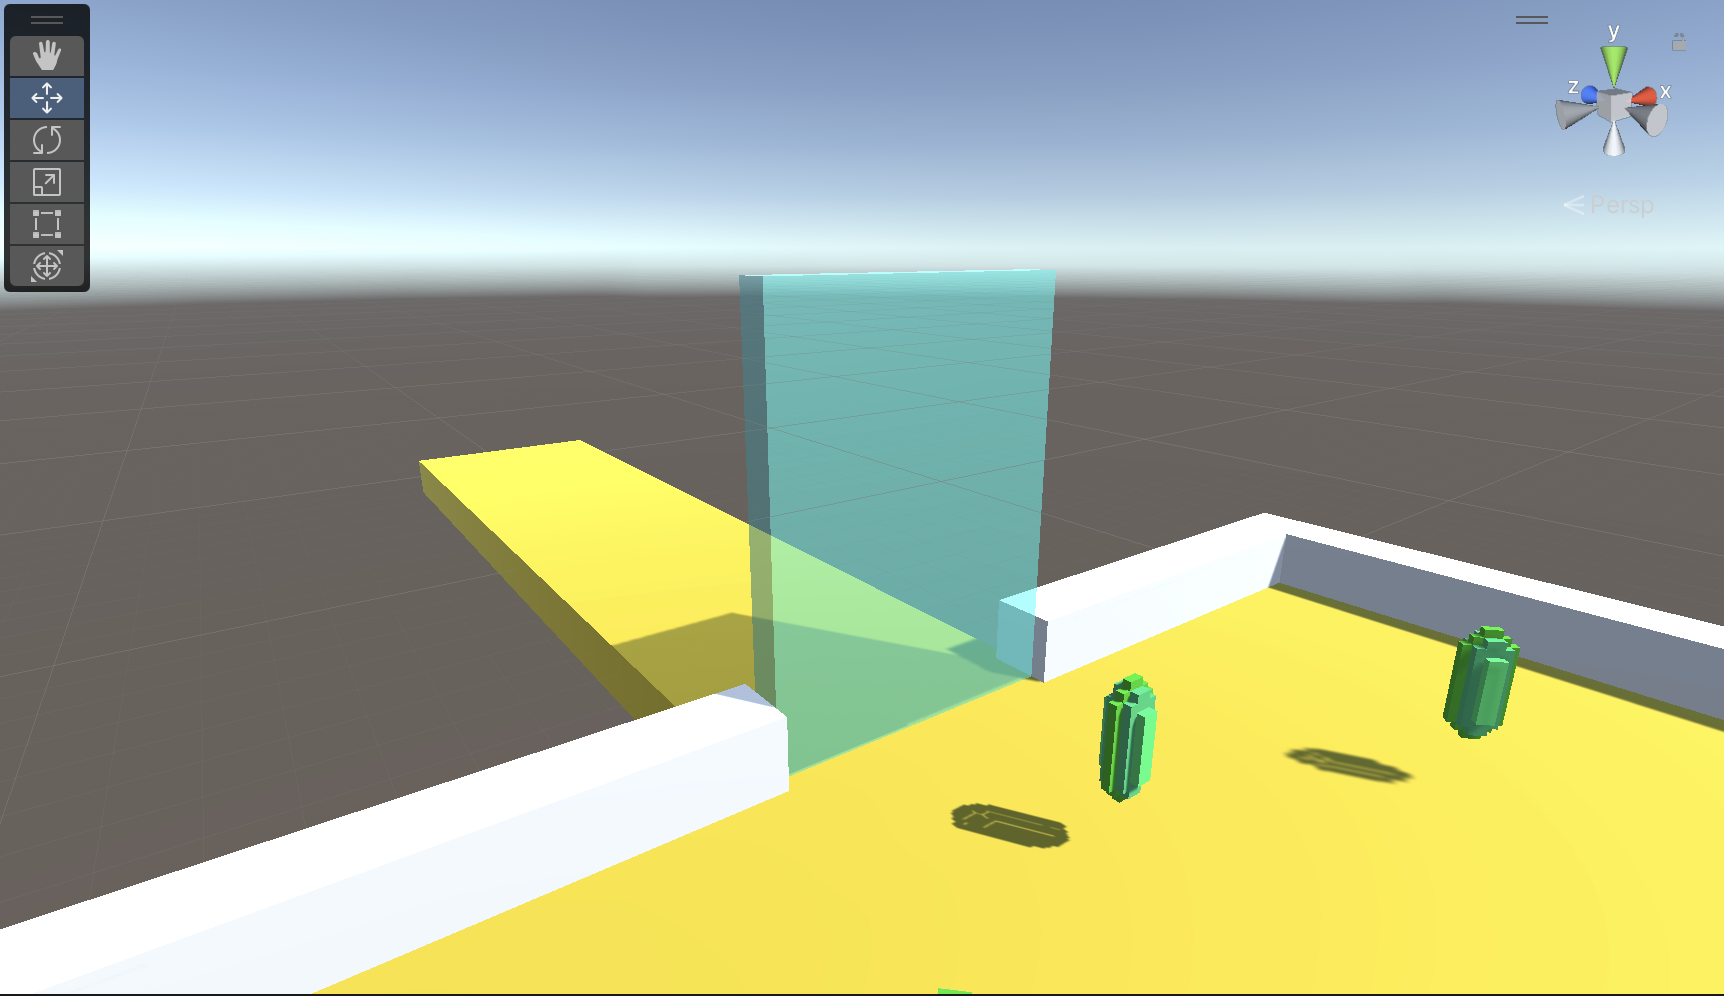
スクリプトの作成
using System.Collections;
using System.Collections.Generic;
using UnityEngine;

public class DoorController : MonoBehaviour
{
    public CollectibleController playerScore;  // プレイヤーのスコアを持つCollectibleControllerへの参照
    public int requiredScore;  // 扉が開くために必要なスコア

    void Update()
    {
        // プレイヤーのスコアが必要スコアに達した場合
        if (playerScore.score >= requiredScore)
        {
            // このオブジェクト(扉)を非表示にする
            gameObject.SetActive(false);
        }
    }
}
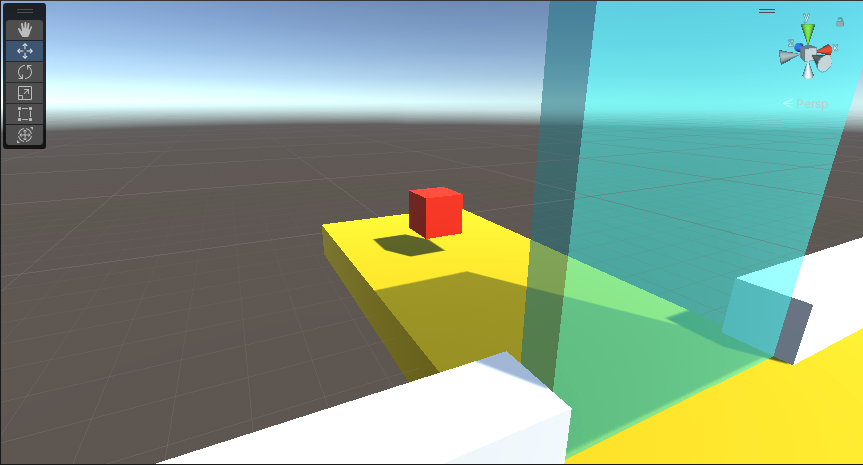
8.ゲームクリアアイテムの作成
スクリプトの作成
using System.Collections;
using System.Collections.Generic;
using UnityEngine;

public class GoalController : MonoBehaviour
{
    public GameObject gameClearUI;  // ゲームクリア画面のUI
    public GameObject resetButton;  // リセットボタンのUI

    void Start()
    {
        // ゲーム開始時にゲームクリアUIとリセットボタンを非表示にする
        gameClearUI.SetActive(false);
        resetButton.SetActive(false);
    }

    void OnTriggerEnter(Collider other)
    {
        if (other.gameObject.CompareTag("Player"))
        {
            // プレイヤーがゴールに触れたとき、ゲームクリア画面とリセットボタンを表示
            gameClearUI.SetActive(true);
            resetButton.SetActive(true);
        }
    }
}-
ゲームオブジェクトを選択します
: あなたが
isTriggerの設定を変更したいゲームオブジェクト(例: リスタートアイテム)をヒエラルキーウィンドウから選択します。 - インスペクタウィンドウから Colliderコンポーネントを探します。 ゲームオブジェクトに追加されているColliderコンポーネント(例: Box Collider, Sphere Colliderなど)を探します。
-
Colliderコンポーネントの中に
isTriggerというオプションがあります。そのチェックボックスにチェックを入れることで、このColliderは物理的な衝突を行わず、トリガーイベントのみを検知するようになります。
次の 「9.ゲームクリア画面の作成」 まで完了するとプログラムが機能するようになります。
9.ゲームクリア画面の作成
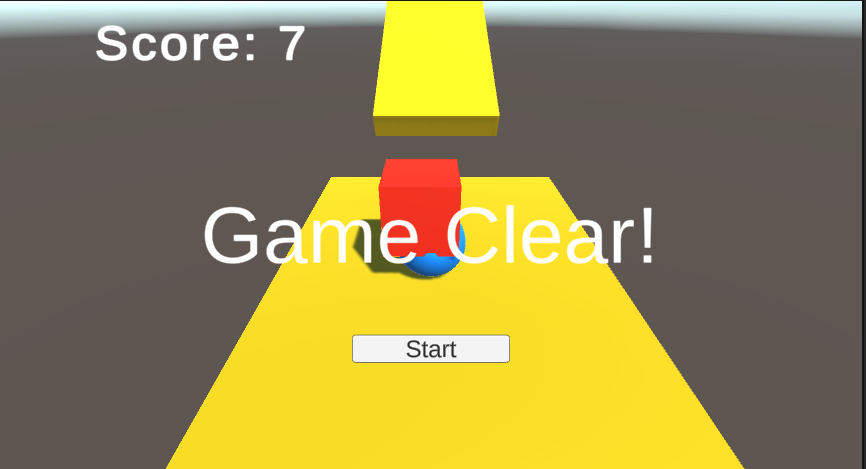
ゲームクリアメッセージの作成
- Unityのエディタ上で"GameObject"メニューを開き、"UI" -> "Text - TextMeshPro"を選択します。
- 新しいテキストオブジェクトに"Game Clear!"というメッセージを設定し、文字の大きさ、色、位置などを調整します。
- デフォルトではこのUIは表示されますので、一度非表示にしておきます(UIオブジェクトを選択し、Inspectorウィンドウの右上にあるチェックボックスをクリックします)。
ゲームリセット用ボタン の作成
スクリプトの作成
using System.Collections;
using System.Collections.Generic;
using UnityEngine;
using UnityEngine.SceneManagement;

public class ResetGameButton : MonoBehaviour
{
    public void ResetGame()
    {
        // 現在のシーンを再読み込みしてゲームをリセットする
        SceneManager.LoadScene(SceneManager.GetActiveScene().name);
    }
}-
Unityエディタで
GameObject->UI->Button - TextMeshProを選択して新しいボタンを作成します。このボタンに「Reset Game」などというテキストを設定します。 -
作成した
ResetGameButtonスクリプトをボタン自体にアタッチします。 -
ボタンを選択して、インスペクタウィンドウで
On Click()イベントを見つけ、+ボタンをクリックして新しいイベントを追加します。 -
ボタンオブジェクトを
On Click()イベントのオブジェクトフィールドにドラッグ&ドロップします。 -
ドロップダウンリストから
ResetGameButton -> ResetGame()を選択します。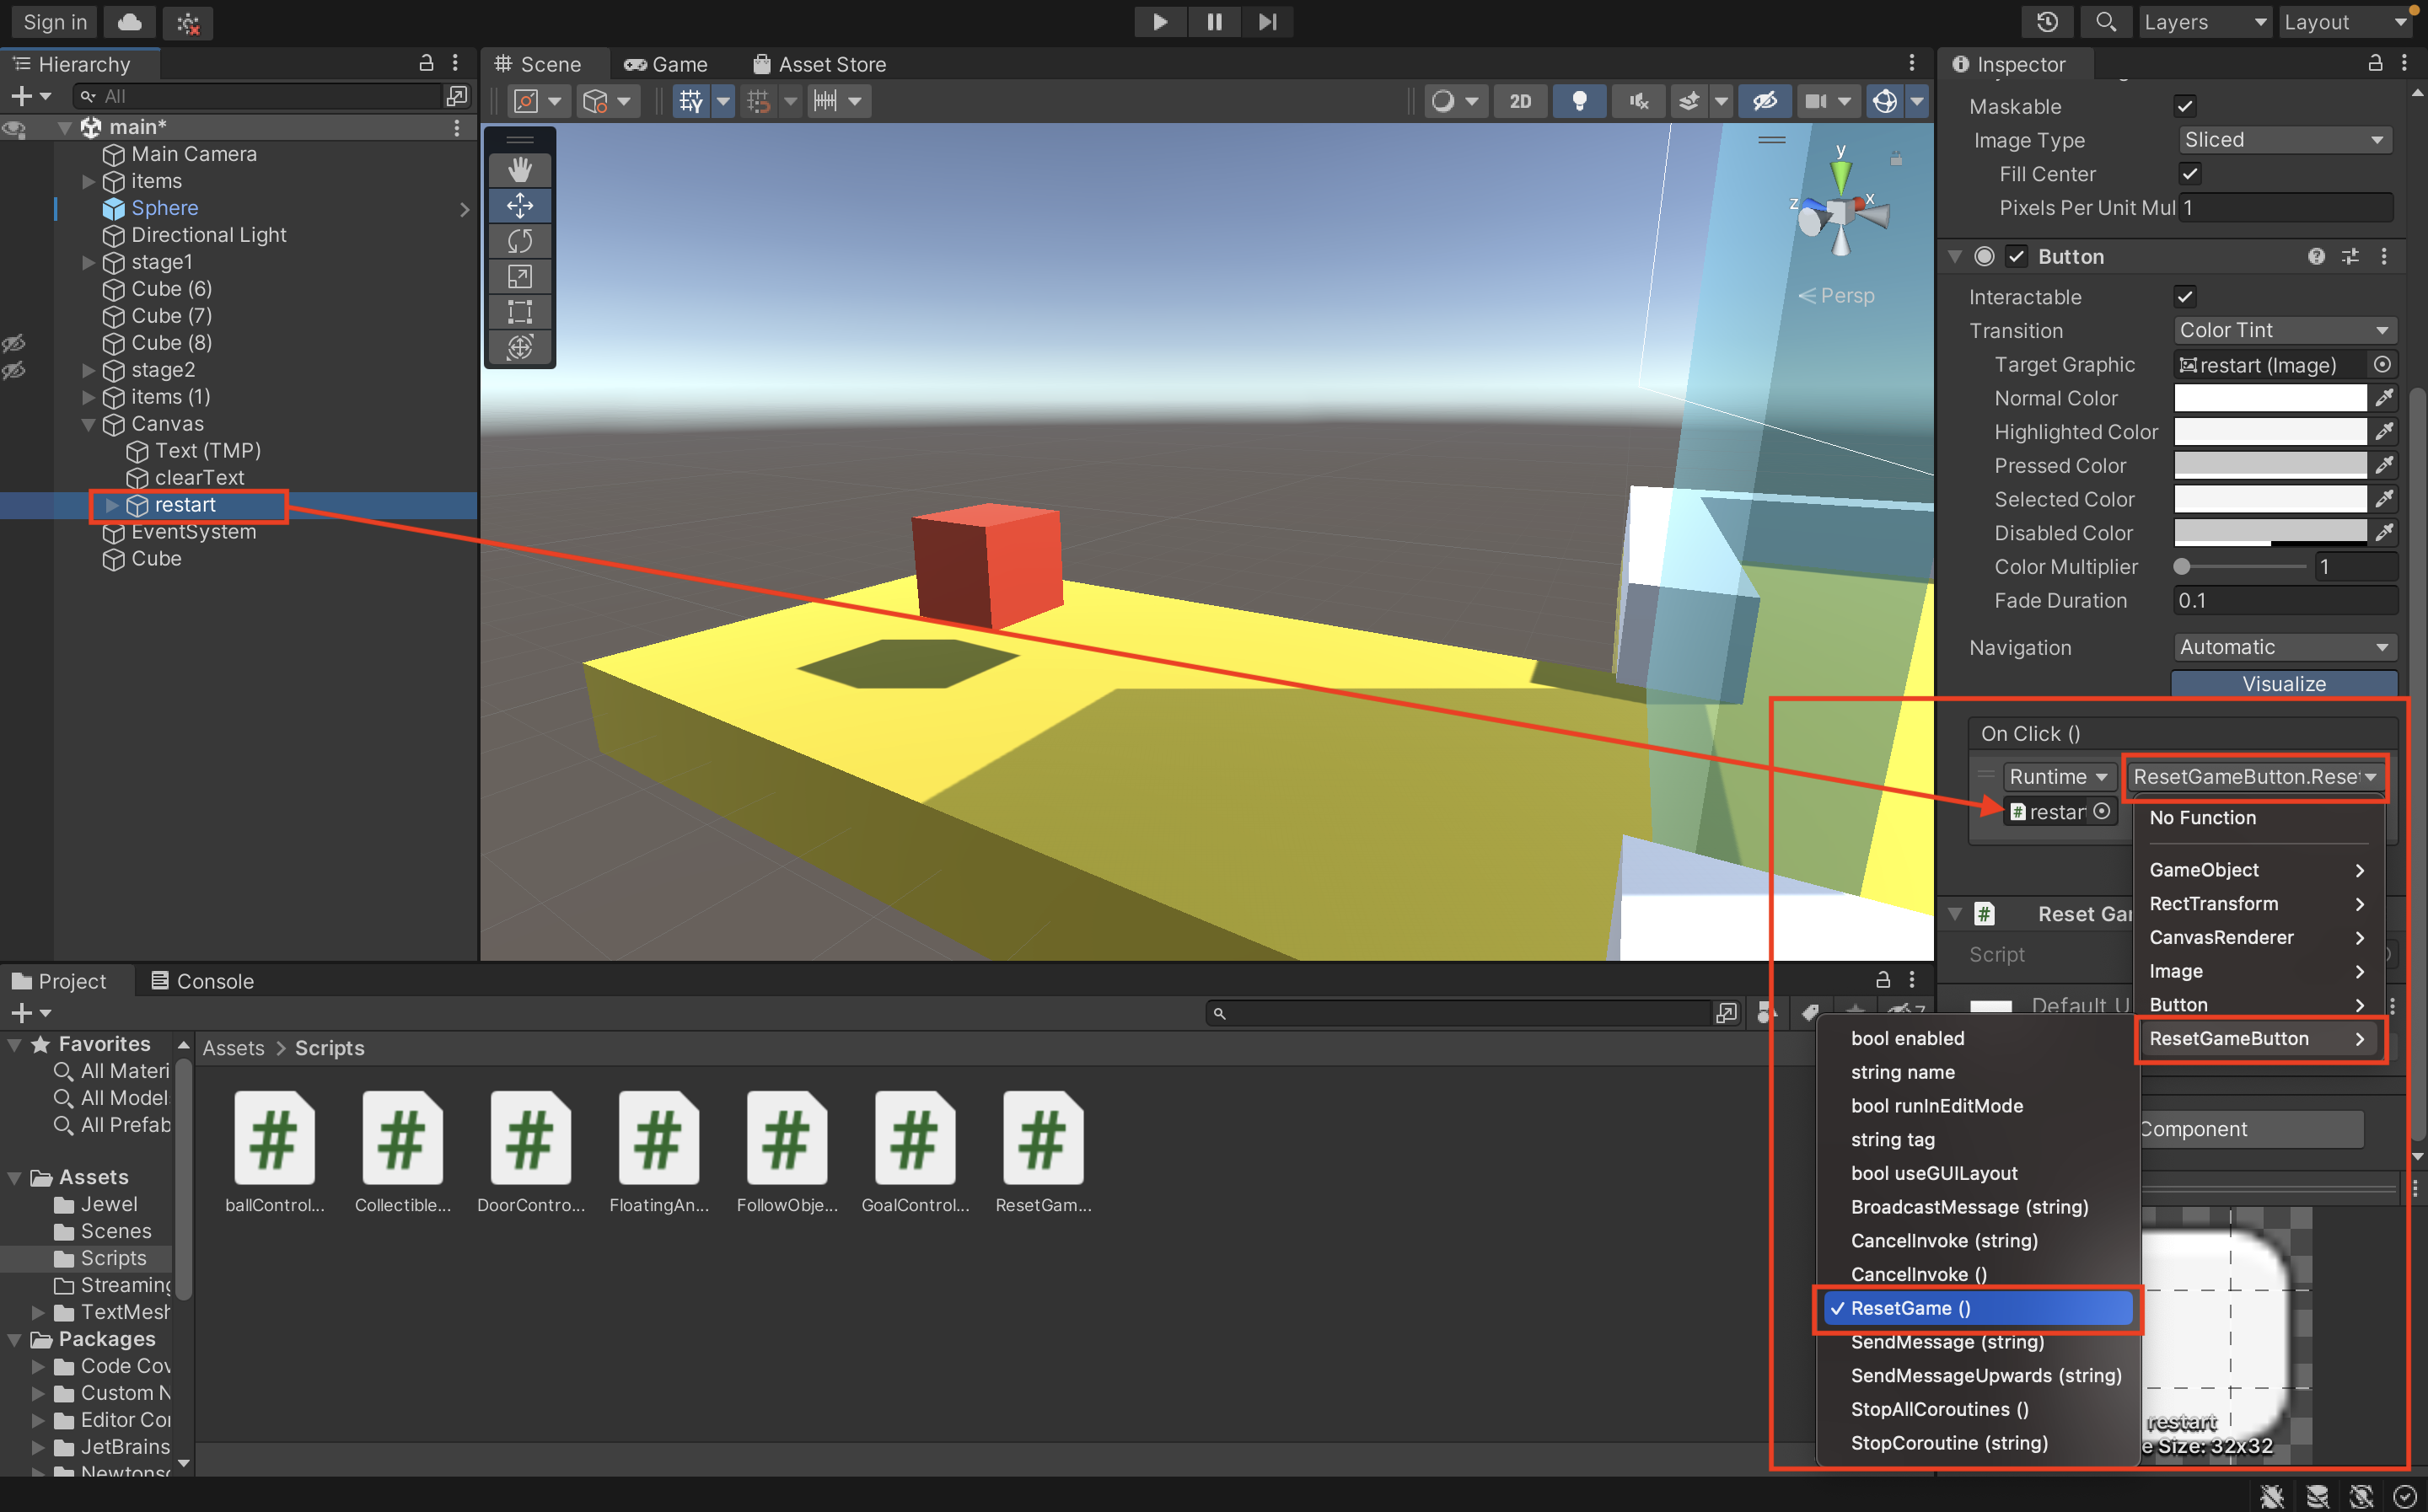
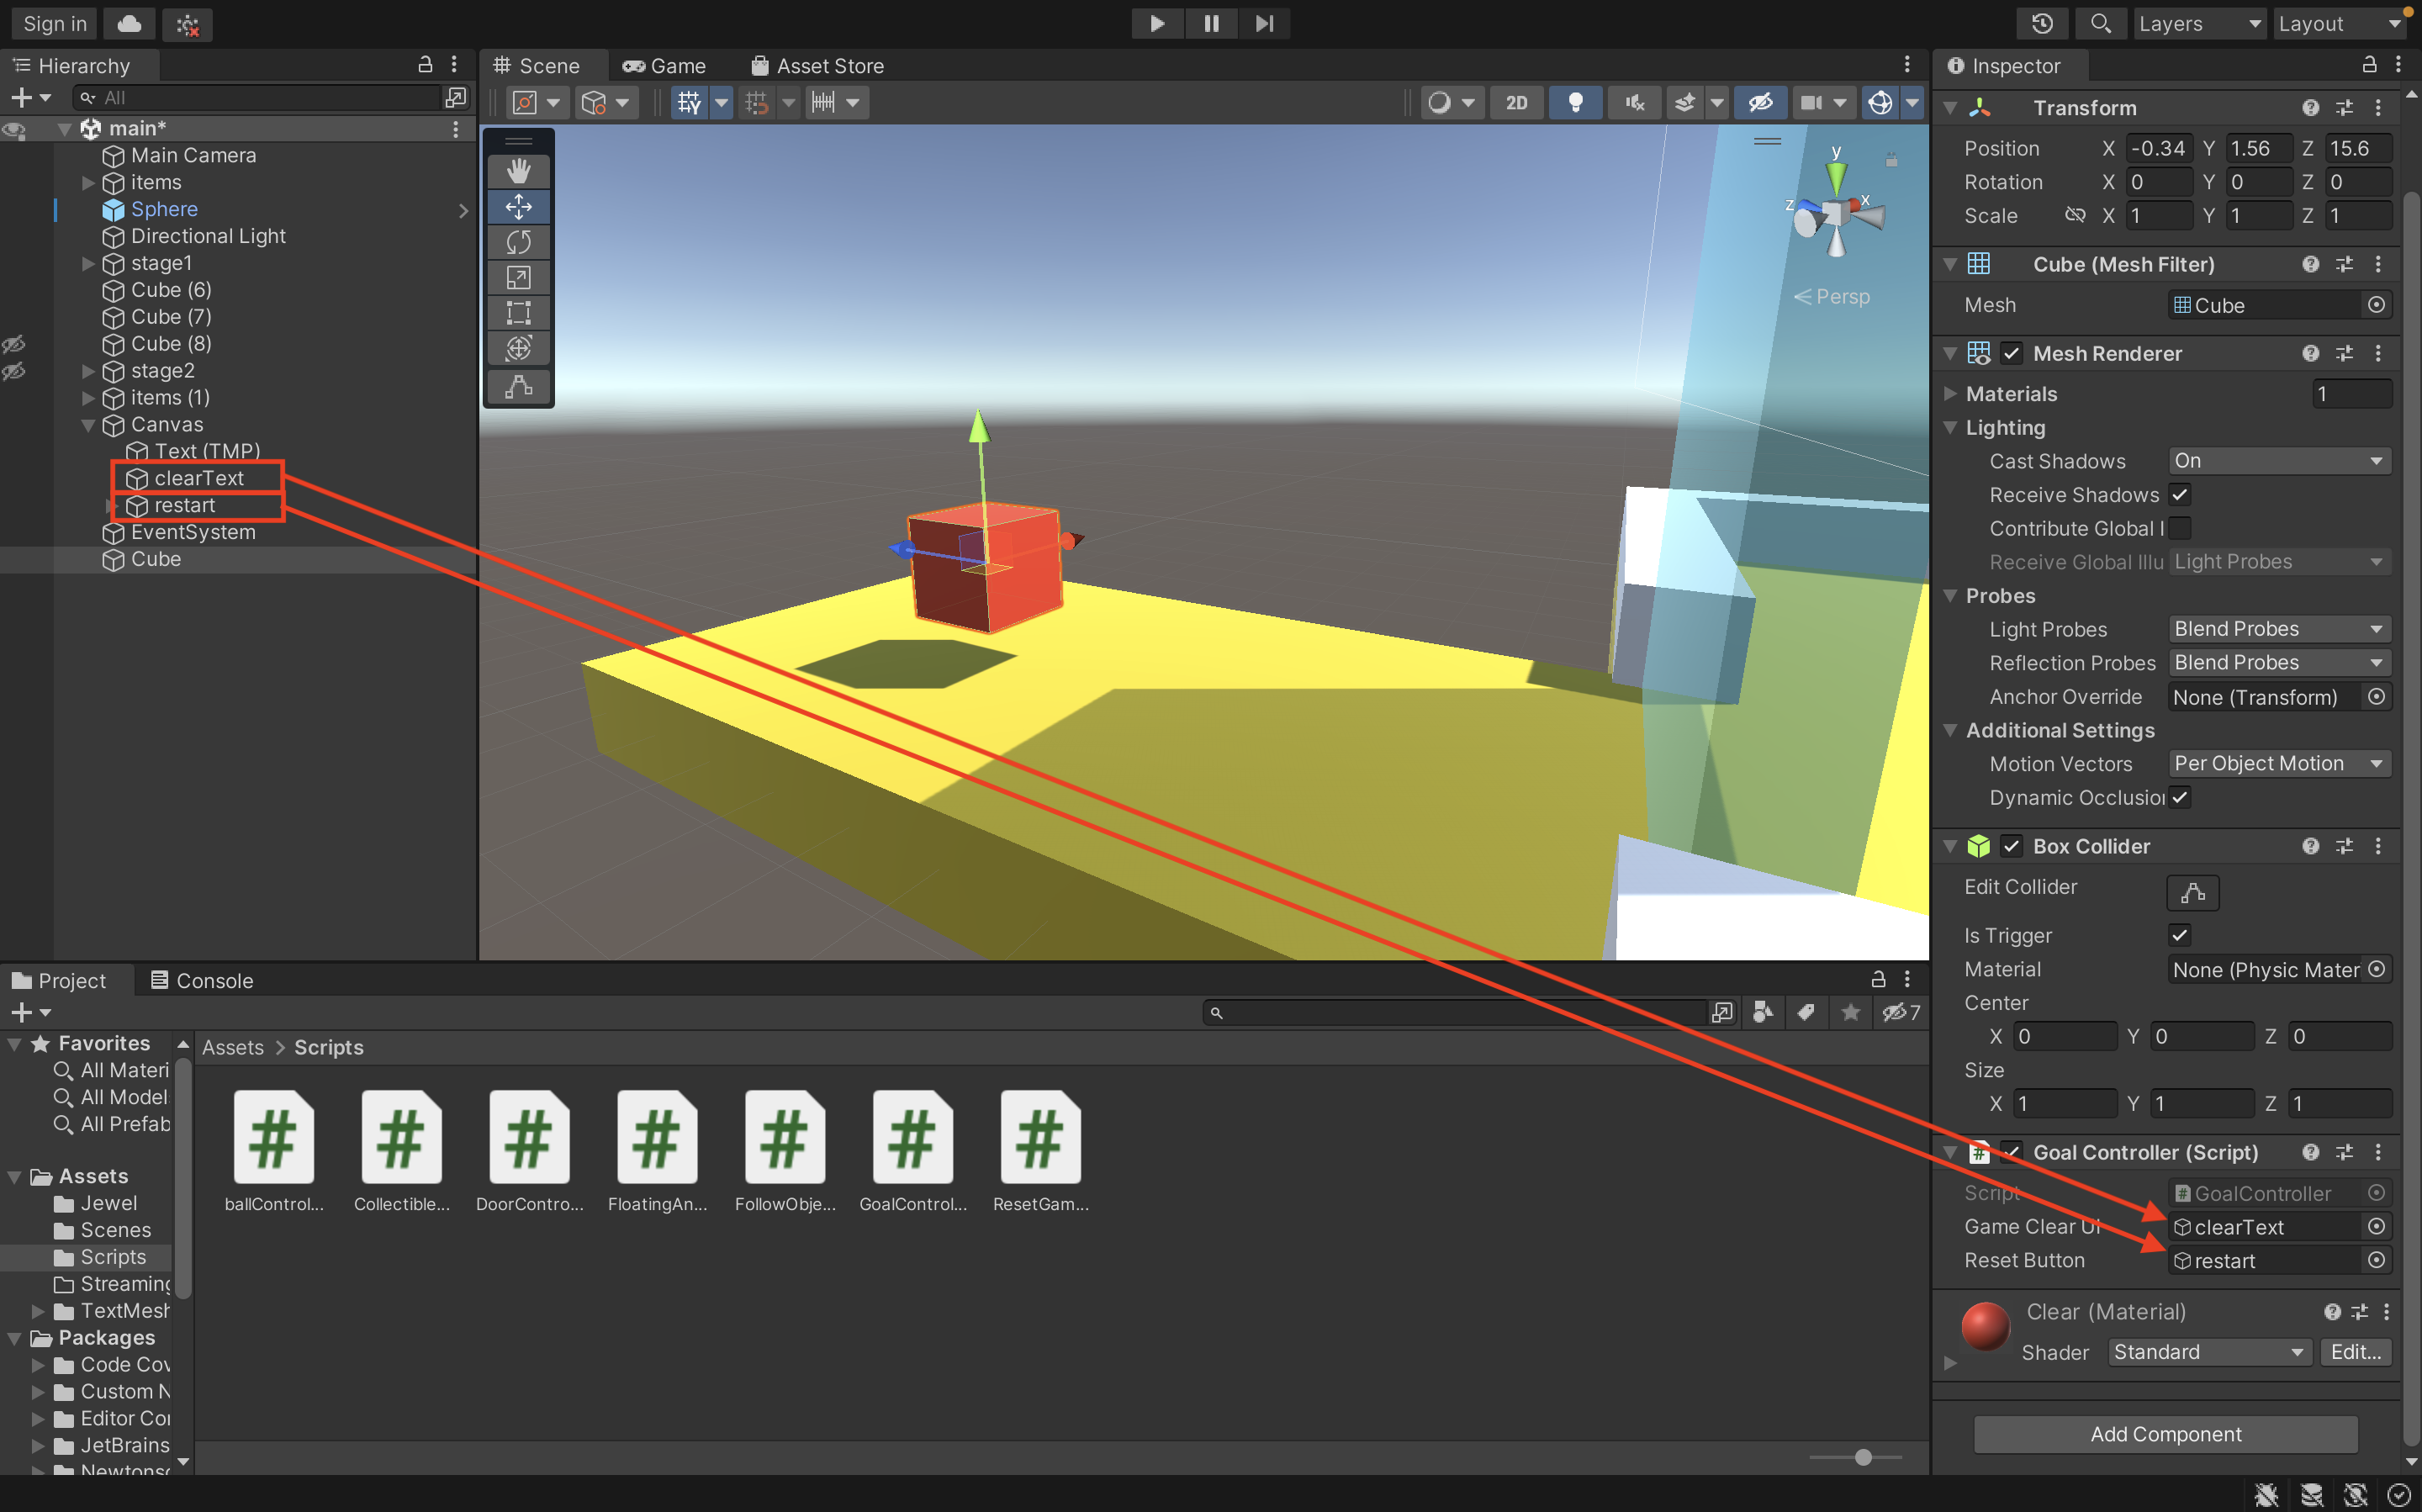
GoalControllerにスクリプトを設定
画像のようにドラッグ&ドロップでオブジェクトを設定します。
10.ボールが落下した時にリセットボタンを表示する
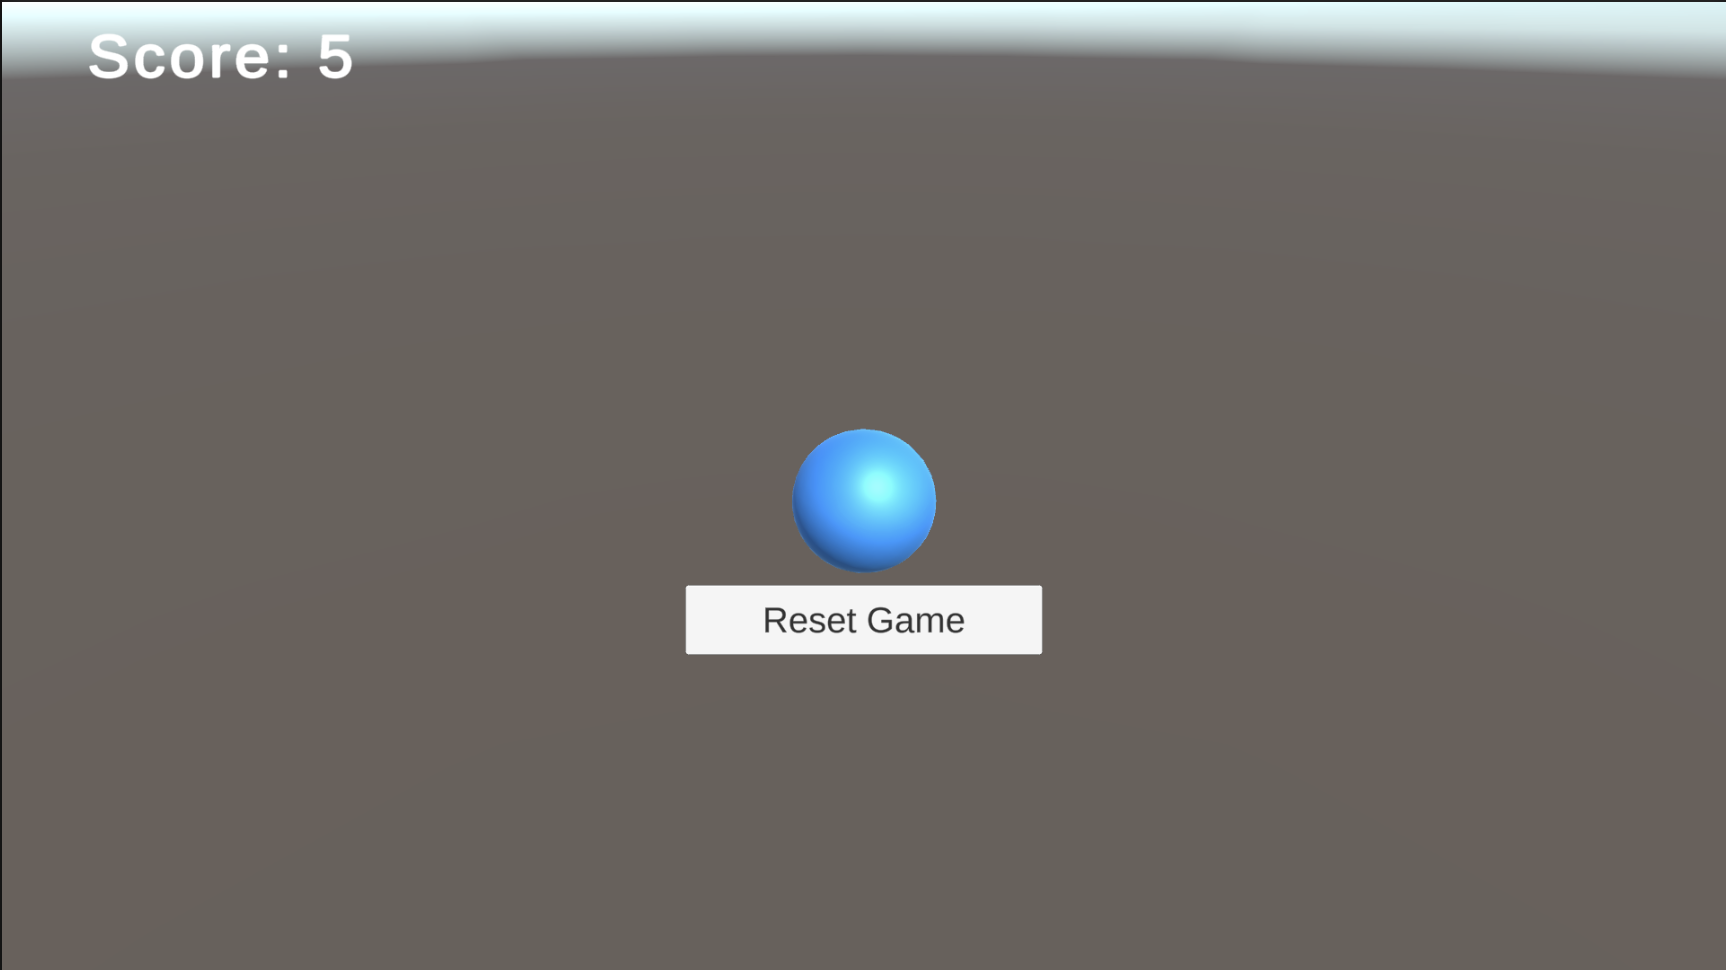
スクリプトの作成
using System.Collections;
using System.Collections.Generic;
using UnityEngine;

public class PlayerFallController : MonoBehaviour
{
    public float fallThreshold = -10f;   // y座標のしきい値
    public GameObject resetButton;       // リセットボタンのUI

    void Update()
    {
        // プレイヤーのy座標がしきい値を下回ったらリセットボタンを表示
        if (transform.position.y <= fallThreshold)
        {
            resetButton.SetActive(true);
        }
    }
}-
プレイヤーオブジェクトに上記の
PlayerFallControllerスクリプトをアタッチします。 -
インスペクタウィンドウで、
PlayerFallControllerの設定を行います。-
Fall Thresholdをプレイヤーが落下するとゲームをリセットするy座標のしきい値として設定します。 -
Reset Buttonフィールドに先ほどの「Reset Game」ボタンをドラッグ&ドロップして設定します。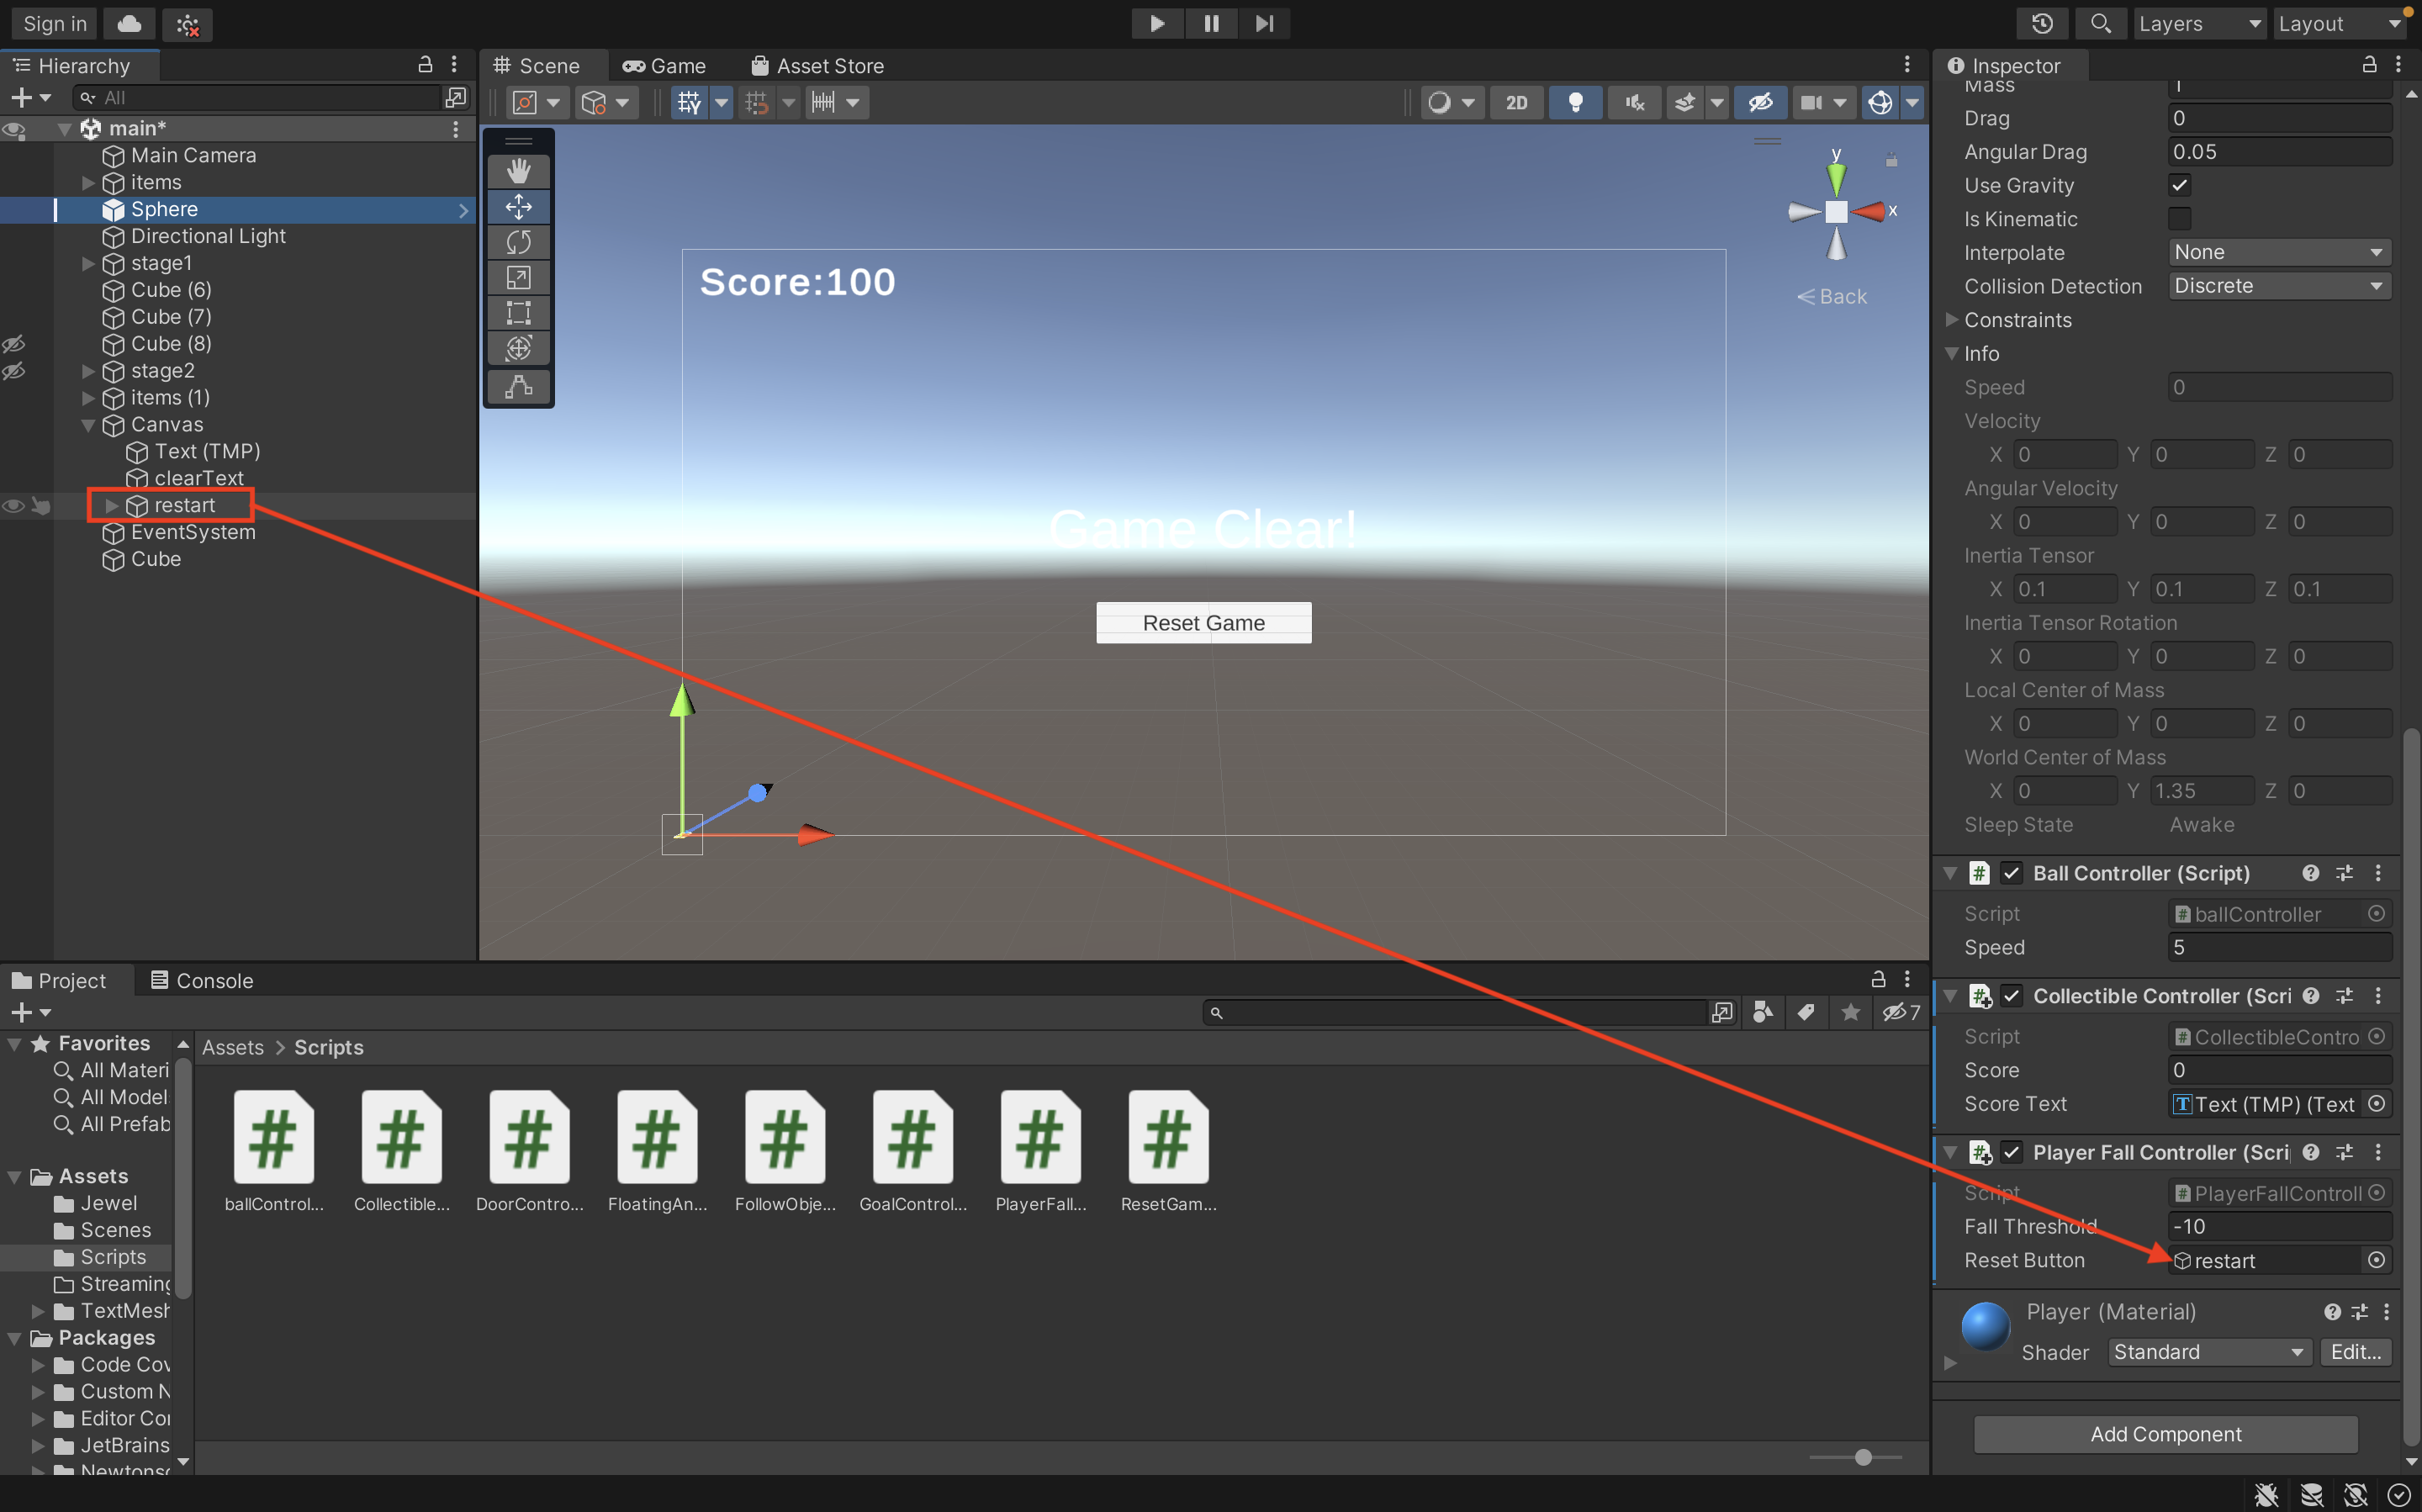
-
カスタムリストを参考にさらに面白く改造していこう
